Monday, October 6, 2014

Destiny: The Last Word

Top: In-game model
Bottom: My prop


Sanding, filling, priming the 3d printed parts.


This is a lot faster and smoother than trying to clay up the entire area


I just used hot glue to quickly put down registration keys and ridges.

First half of cylinder mold.


Cylinder and  "power cell" molds.

It was a little wonky setting up the mold for the grip.

Main body mold.

To create the mother mold, I just decided to pour about 1/4" of resin on top of the cured silicone.
It's a bit wasteful of the resin, but it's way quicker and more convenient than cutting plexi-glass.


I didn't take a bunch of pics of the steps leading up to the next few pics. I poured the cast solid since it's a thin part, then I tried a few different methods for trying to get the gold in the recessed areas.

In this pic, I think I hand painted gold into the recesses and wiped away the excess. I didn't care for that method so here I'm trying something else. I've masked off the areas that will remain black.

The result is that all the stuff that should be gold is gold, but here I have a giant gold section through the middle that really needs to black. I ended up hand painting the black back over the gold. Since the recesses are so deep, I didn't have to worry about getting black in the gold areas.

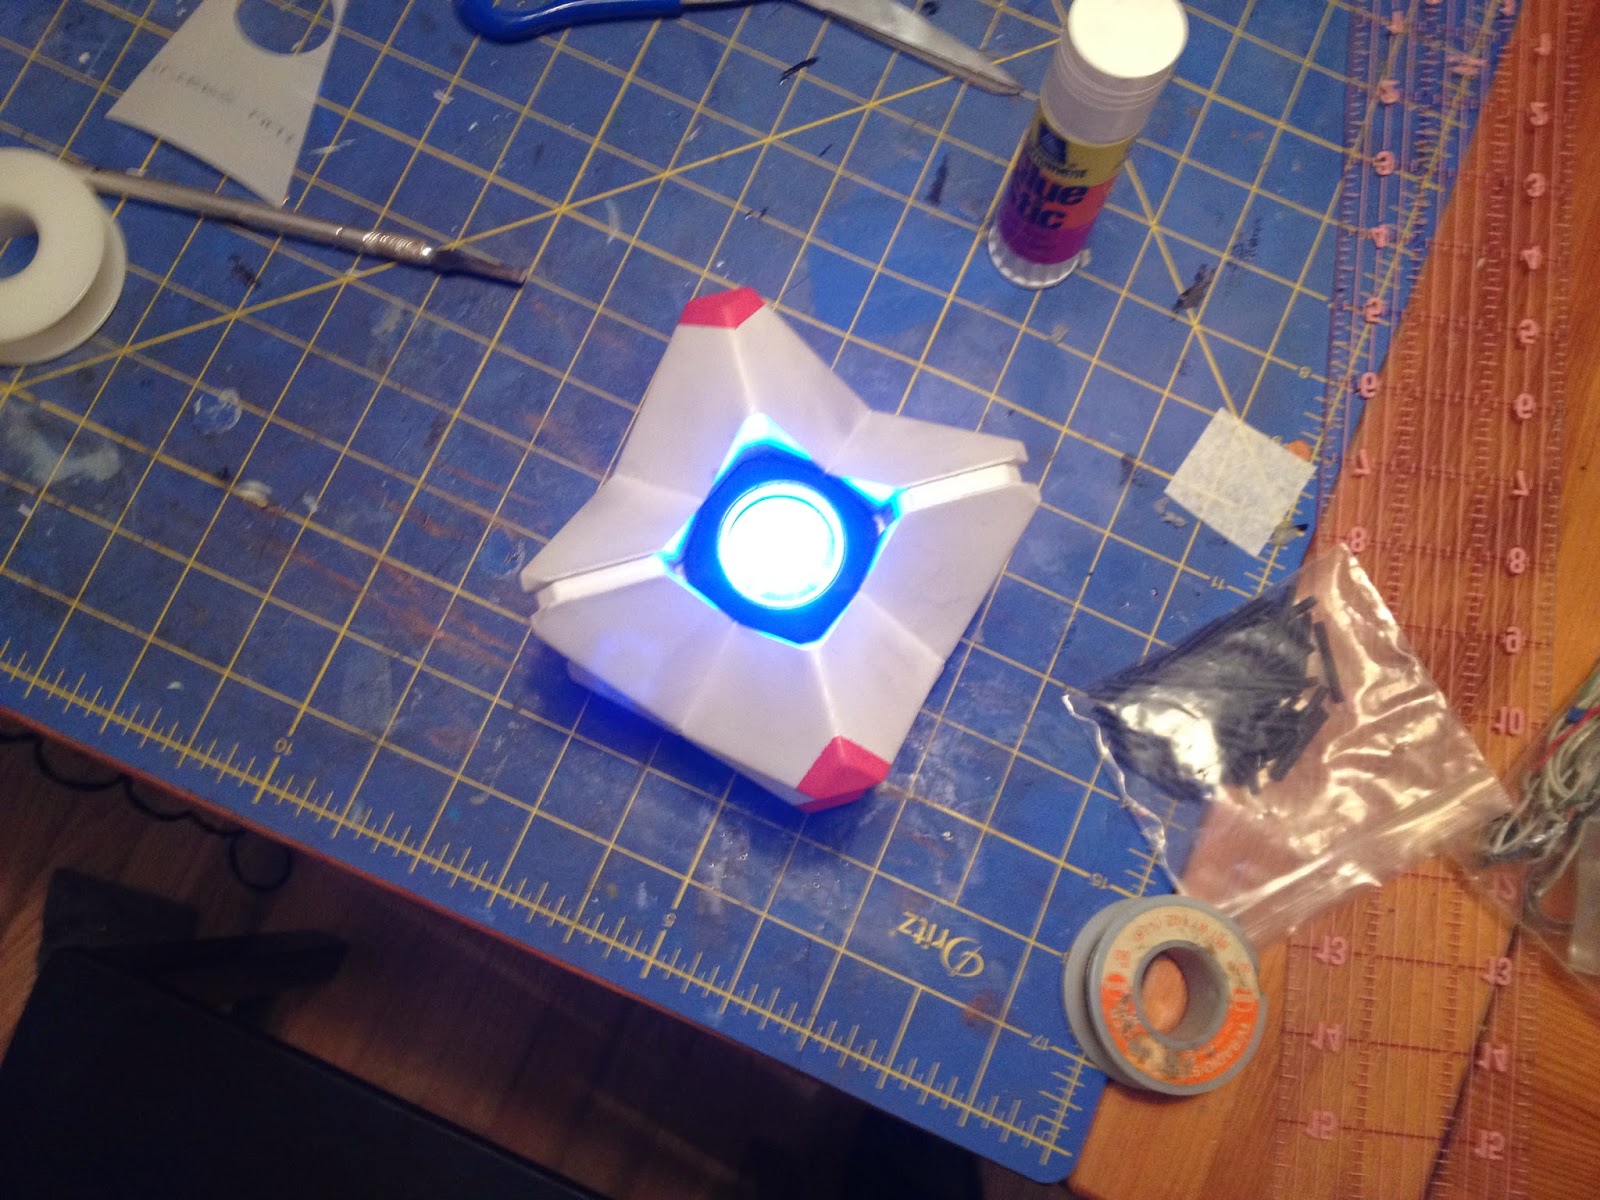
This is the cylinder and the cylinder arm. I had the idea to try using rare-earth magnets to hold the cylinder in place that way there would (literally) be some wiggle room when the cylinder swings out to release the power cell.
 Which ended up working out great.

Some final pics:


Tuesday, September 30, 2014

Saturday, March 1, 2014

Destiny: Hunter Knife


Taking the 3D-printed Hunter Knife and filling, sanding and priming.


Starting two-part mold.


Here, I added an exhaust port because air-bubbles will absolutely form at the tip of that fish-cleaning hook. Yes, that's right. Destiny's Hunter Knife has a fish-cleaning hook on the back.


One half poured.
Not pictured: The the steps of boxing up the silicone and pouring the second half of the mold


First cast.


Painted, and shined up. Just need the handle wrap and they're done.

As production of Destiny continued, some things changed. I needed to change the props with them. 
Here is the final Hunter Knife prop which matches the final in-game look.


Saturday, February 1, 2014

Destiny: Ghost


As with the Thorn hand cannon, I took the finished-out 3D printed version and created molds.


Pulling a cast of the Ghost proved to be quite tricky. There were many failed pulls, but eventually I got the method down. It's still tricky, but I know how to do it. I made a video showing how I slush cast the Ghost here:


Initially, I thought I would hold the two ghost halves together with pegs and holes. I needed something where I could open and close it so I could install the electronics.This didn't work because the pegs ended up being too weak.


I ended up using some rare-earth magnets. This works great, but watch your fingers when you're closing the halves it'll snap'em pretty hard.


Here, I've started working on the electronics. After I tried a few different ideas with various LEDs, I ended up using a cheap 9-LED flashlight and hack-sawing the top off. In the picture below you can see the orange-aluminum flash-light top and the blue lighting gel I use to turn the light blue.


I used a piece of lexan plastic for the "lens" and I had some vinyl stickers cut for the shape of the occulus.


Here's the flash-light top.


Here, I have it all wired up with a toggle switch which I will mount on the back half of the Ghost.


The 9-LED flash-light ended up being blindingly bright which is cool, but not very practical. I ended up placing some light-diffusing sheets between the "lens" and the blue gel...


...which toned it down to acceptable levels.

I also made an "Intrusion Ghost" variant:


Here's the whole family, including the ghost that comes with the Ghost Edition of Destiny.
The ghost edition ghost is a bit smaller. It's kind of like comparing a baseball to a softball. I feel like the scale I chose is closer to what it looks like in the game.